


How We Use Bleed in Our Custom Designs
The word “bleed” is a common term with digital designers. Bleeds allow you to run artwork to the edge of whatever is being printed. On a press, artwork is printed on a large sheet of corrugate and then trimmed down to size. Adding a bleed ensures there are no margins.
In simple terms, bleed extends your design so it’s slightly larger than the finished print size. It ensures you get the results you want.

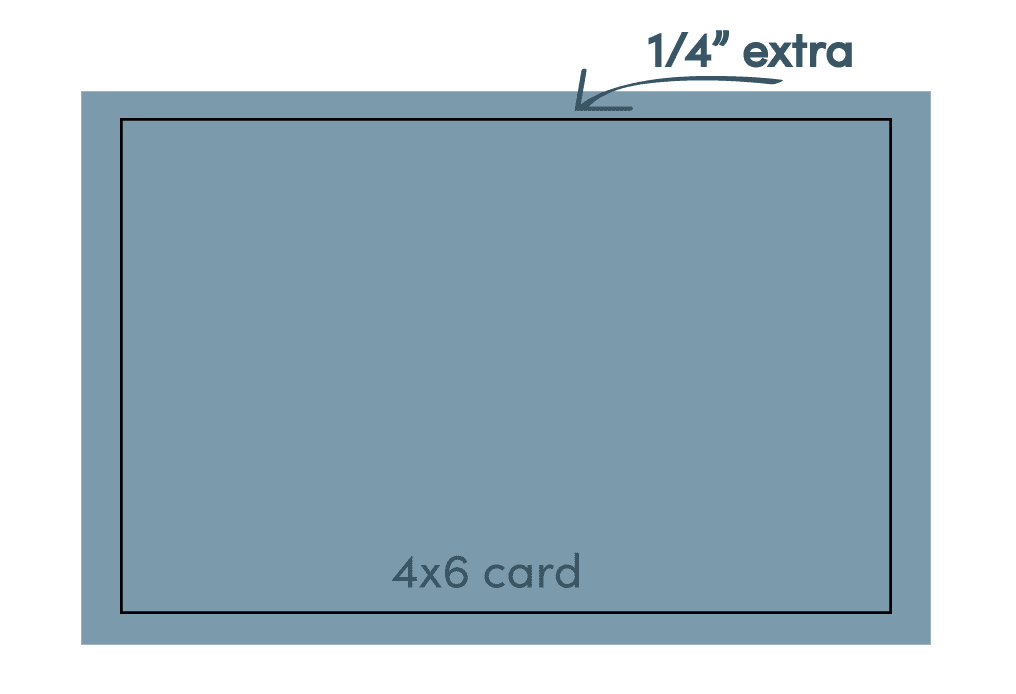
We recommend a minimum bleed of 1/8″ of an inch – that way even with small mechanical variations, you won’t be left with a hairline white (or kraft) edge.
For example, if you’ve designed a standard 4″ x 6″ card with a blue background, you would want to extend the background to look like this.
Using bleed in CompanyBox templates
Extending your background or art on a flat card is fairly simple. Same principles apply when designing a custom box, but this time there are more curves and angles to consider.
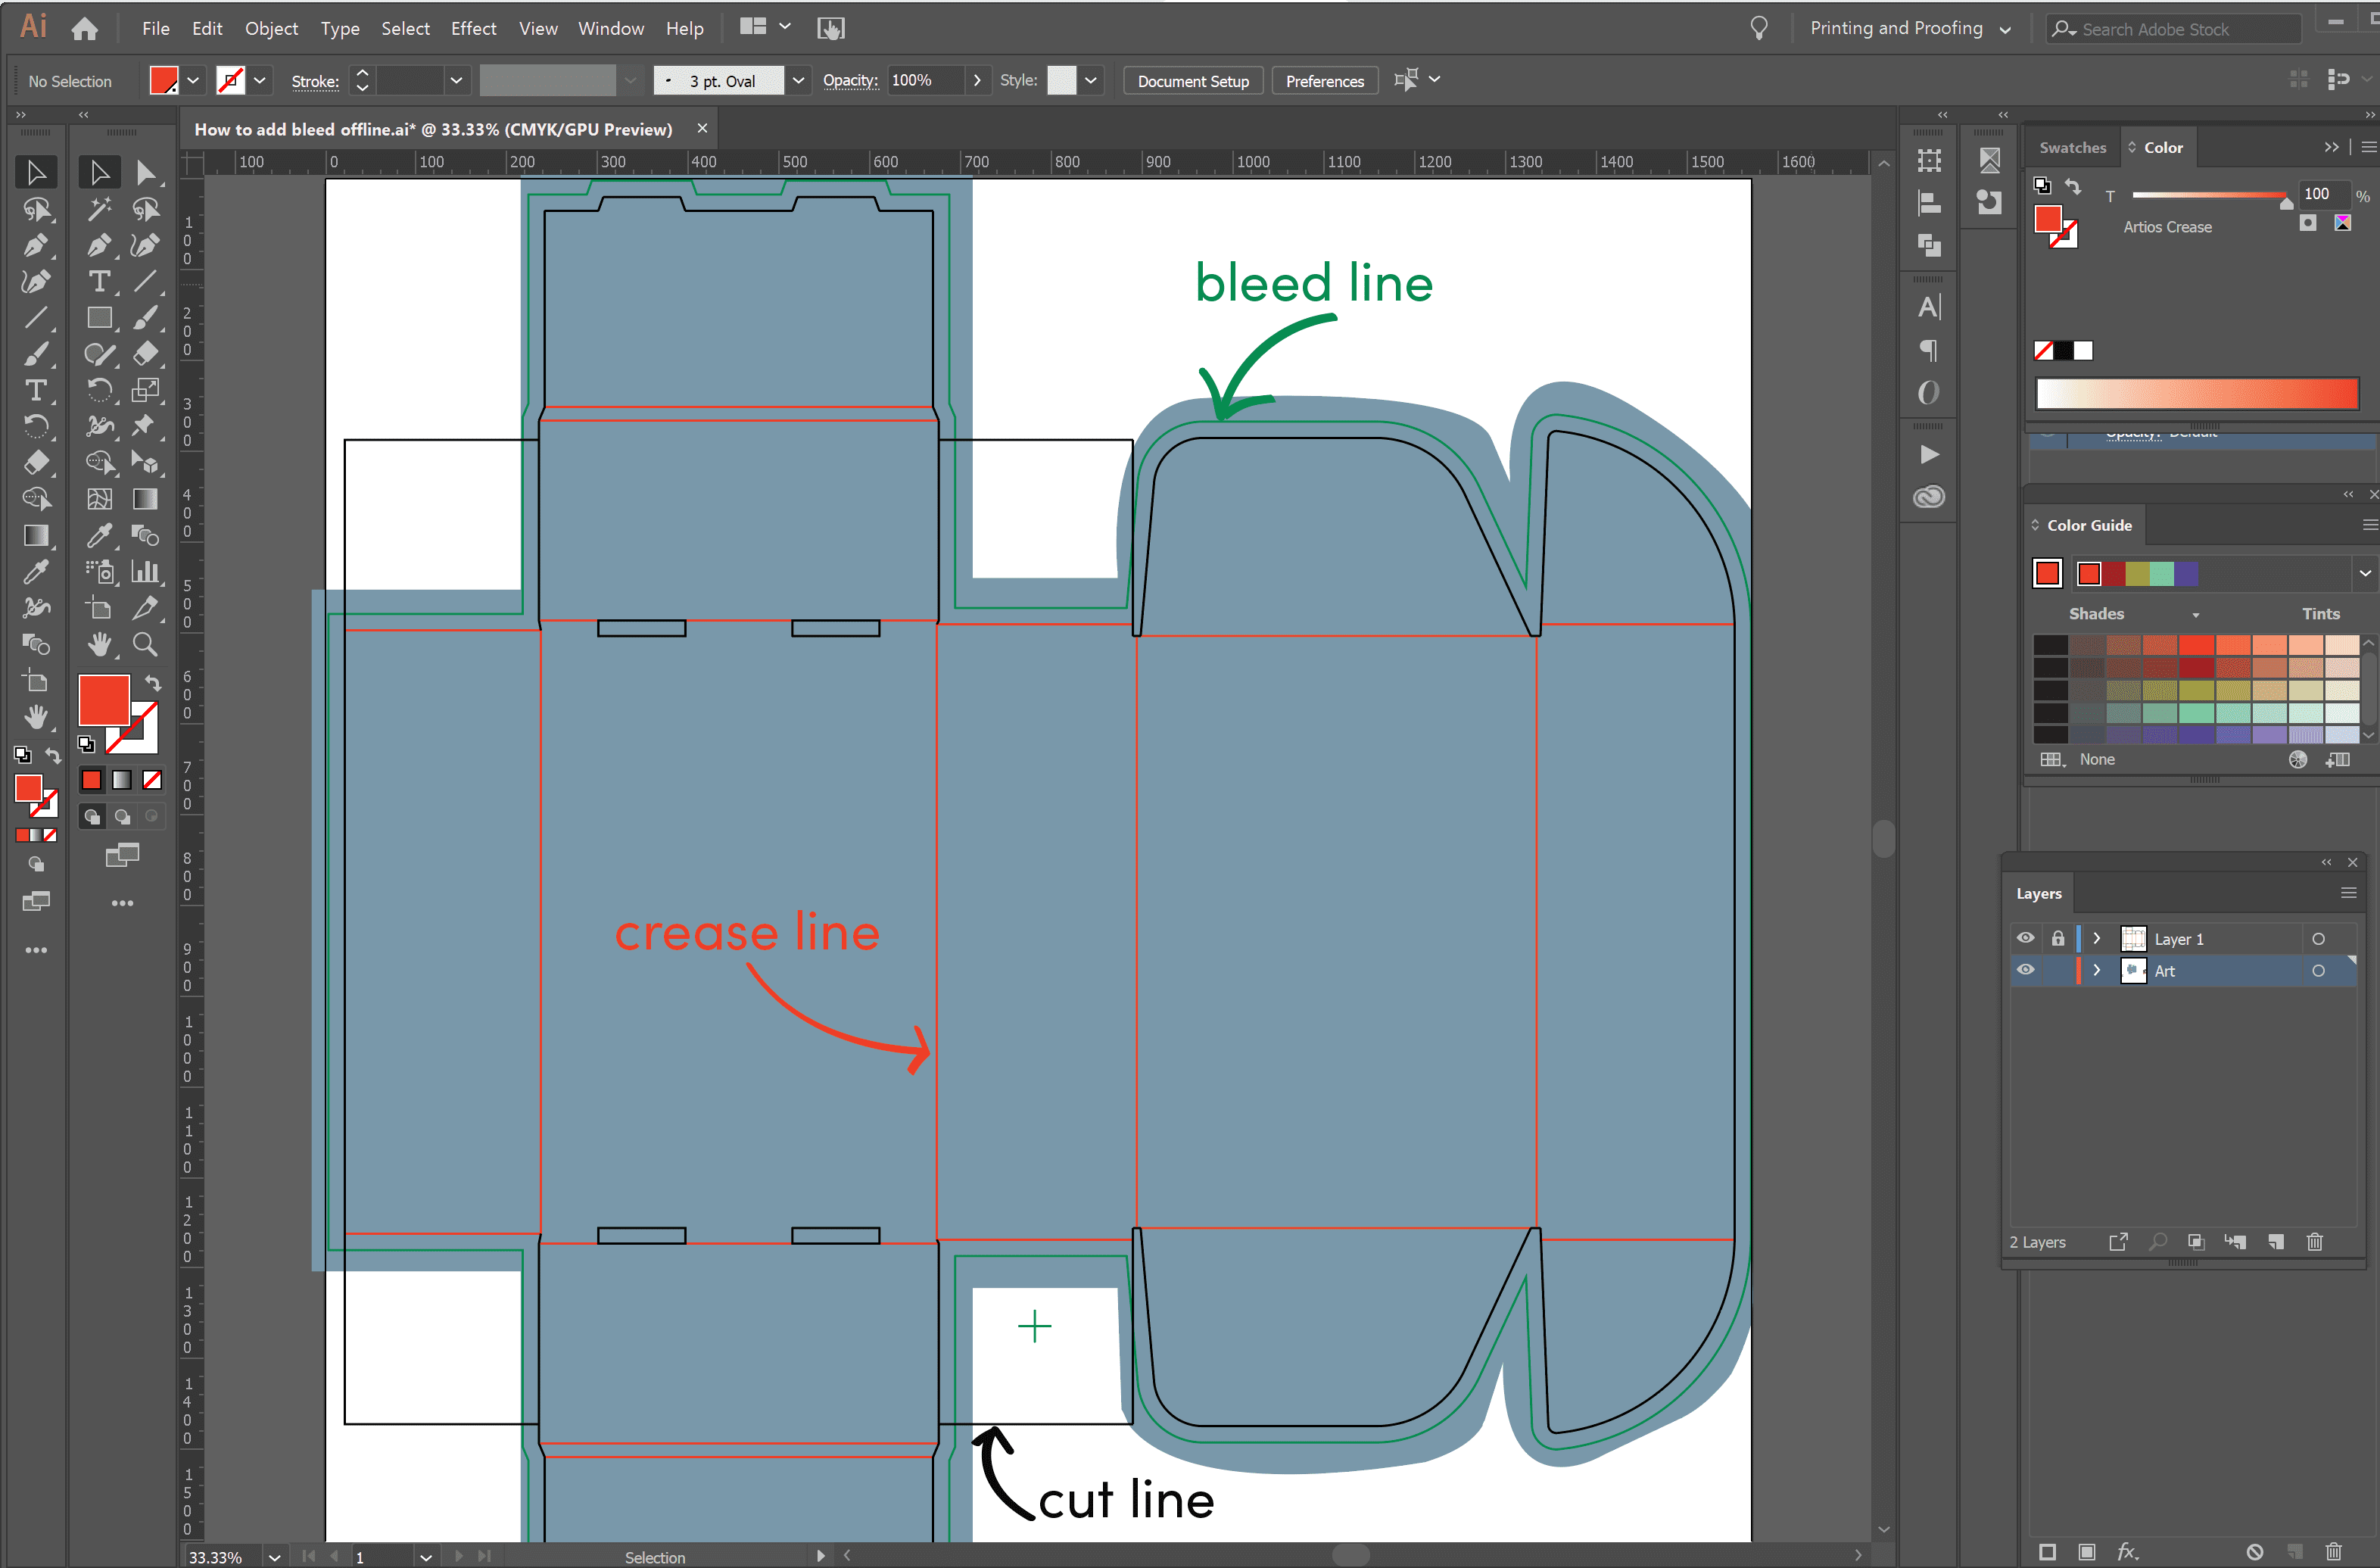
Three types of lines to remember in packaging design:
Crease lines display where the box will fold. Designs and images can extend over these lines, but be sure to pay attention to what will be hidden when the box is all folded up.
Cut lines are pretty self explanatory. The box will be cut from a flat sheet following these lines. We recommend keeping text a safe distance from these lines.
Bleed lines show how far you should extend your design.
Now, let’s explain how to create a project with those lines in place.
Online designer
It couldn’t get any easier if you’re using our online designer. Be sure to take notice of those three colored lines.
- Start a new project
- Choose product style, size and print options
- Click > Online Designer
- If you want a colored background, choose a color from the Toolbar
- The color will automatically extend the color to the green bleed lines
- Be sure all other artwork reaches the green line
- Add quantity and add to cart.

Adobe Illustrator
If you want to work offline, it’s best to create your design in Adobe Illustrator.
- Choose your product style and size, then download that template
- Right click the PDF > open with > Adobe Illustrator
- You will see the template with bleed, cut and crease lines. Do not adjust these lines! (Do not rotate or resize the template to fit your artwork either.)
- Add a new layer for art. You’ll want to place all your designs on this art layer
- Be sure to carry all artwork out to the bleed lines
Now you can start flexing those design muscles. Pull in high resolution images or vector art from sites like istock.com. Add logos or text and you’ve got a box that will turn heads.
Last step is to upload the completed file/files in PDF format to the CompanyBox website. Keep our lines in place- we’ll remove them before printing. Promise!

To add an inside print, just repeat for a second PDF. Just be sure to send over those files separately.
Albert Einstein said, “Creativity is intelligence having fun.”- Go have fun with with your designs. We can’t wait to see what you create!
Interested in creating unique packaging that reflects your brand? We’ve got designers who can help, or create your own with our online design studio.
How can we help?
We’re all ears. Drop us a line and we’ll get in touch!


See It to Believe It.
Get started with a sample CompanyBox mailer.